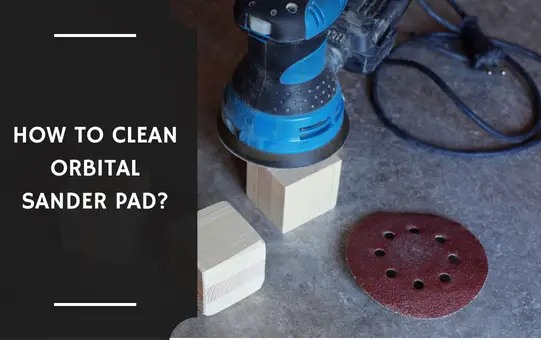
When it comes to woodworking and DIY projects, an orbital sander is a valuable tool. It helps smooth surfaces and ensures a professional finish.
How to Clean Orbital Sander Pad?
To clean the orbital sander pad, wet the pad with a spray bottle filled with water. Apply the water to the pad in a circular motion. Let the pad dry.
In this article, we will discuss how to clean your orbital sander pad effectively, sharing some personal stories along the way. Let’s dive in!
See Also: What Is Orbit Sander?
How to Clean Orbital Sander Pad? – Guide
A clean sander pad is crucial for optimal performance. A clogged pad not only decreases sanding efficiency but can also leave unwanted marks on your project. Cleaning your sander pad regularly will extend its lifespan and ensure consistent, high-quality results.
Gather the Necessary Tools and Materials
Before starting the cleaning process, make sure you have the following tools and materials on hand:
- Compressed air canister or an air compressor: This will help remove loose dust and debris from the sanding pad.
- Soft brush or toothbrush: Use this to gently scrub the pad’s surface and dislodge stubborn particles.
- Cleaning solvent: Depending on the type of residue on your sander pad, you may need a suitable cleaning solvent. Common options include isopropyl alcohol, denatured alcohol, or a mild detergent mixed with water.
- Microfiber cloth or soft lint-free cloth: This will be used to wipe down the pad after cleaning.
Disconnect the Power Source and Remove the Sandpaper
Safety should always be a priority when working with power tools. Begin by disconnecting your orbital sander from the power source.
Next, remove the sandpaper from the sanding pad. This will allow you to access the pad more easily for cleaning.
Remove Loose Dust and Debris
Hold the compressed air canister or air compressor nozzle a few inches away from the sanding pad.
With short bursts, blow air across the surface to dislodge any loose dust and debris. This step will help prevent scratching the pad when you begin scrubbing.
Scrub the Sanding Pad
Take your soft brush or toothbrush and gently scrub the surface of the sanding pad. Use light pressure and circular motions to remove any remaining debris or residue.
Be thorough but careful not to damage the pad. If there are stubborn particles, you can moisten the brush with a cleaning solvent to aid in their removal.
Remember to follow the manufacturer’s instructions regarding the use of specific solvents.
Wipe and Dry the Sanding Pad
After scrubbing, take a microfiber cloth or soft lint-free cloth and dampen it with your chosen cleaning solvent. Wipe the pad’s surface thoroughly, ensuring you remove any remaining dirt or residue.
If necessary, repeat this step until the cloth comes away clean. Finally, allow the sanding pad to air dry completely before reattaching the sandpaper or storing the orbital sander.
Tips and Tricks to Clean Sanding Pad
Cleaning a sanding pad is essential to maintain its effectiveness and prolong its lifespan. Here are some tips and tricks to clean a sanding pad:
Safety first
Before cleaning the sanding pad, make sure to disconnect the power source or remove the battery from any powered sanding tool. This will prevent any accidental activation while cleaning.
Remove loose debris
Start by removing any loose debris or particles from the sanding pad. You can use a stiff brush or a compressed air canister to blow away the dust and debris.
This step will help prevent the particles from scratching the pad during the cleaning process.
Soak in warm soapy water
Fill a basin or bucket with warm water and add a mild detergent or dish soap. Submerge the sanding pad in soapy water and let it soak for several minutes. The warm water and soap will help loosen and dissolve any stubborn dirt or residue.
Scrub gently
After soaking, take a soft brush or sponge and gently scrub the sanding pad in a circular motion.
Be careful not to scrub too vigorously, as it may damage the pad. Pay extra attention to areas with stubborn stains or buildup.
Rinse thoroughly
Once you have scrubbed the sanding pad, rinse it thoroughly with clean water to remove any soap residue. You can hold it under running water or use a clean basin filled with water to rinse it.
Allow to dry
After rinsing, shake off any excess water from the sanding pad and pat it dry with a clean towel or cloth.
Avoid using heat sources such as hairdryers or direct sunlight, as they can damage the pad. Instead, leave the sanding pad in a well-ventilated area to air dry completely.
Check for damage
While cleaning, inspect the sanding pad for any signs of damage or wear. Look for tears, fraying edges, or any other issues that may affect its performance. If you notice any significant damage, it’s advisable to replace the pad.
Store properly
Once the sanding pad is completely dry, store it in a clean and dry location. Avoid placing heavy objects on top of it or exposing it to extreme temperatures, as these can deform the pad.
Conclusion
Regularly cleaning your orbital sander pad is essential to maintain optimal performance and prolong its lifespan.
By following the step-by-step guide provided in this article, you can effectively remove dust, debris, and residue from your sanding pad.
Remember to always prioritize safety by disconnecting the power source and removing the sandpaper before cleaning.
With a clean sanding pad, you’ll achieve better results in your woodworking projects and ensure the longevity of your orbital sander.
Read Also: Can I Use Orbital Sander to Polish Car?
how to clean orbital sander discs?
Cleaning orbital sander discs is crucial to maintain their effectiveness. Start by removing the sanding residue with a cleaning stick or crepe rubber block. These tools help remove debris without damaging the abrasive surface.
how to clean sanding pads?
To clean sanding pads, disconnect them from the sander, use a crepe rubber block for foam/rubber pads, or a brush for hook-and-loop pads to remove debris. For heavy cleaning, soak in soapy water, rinse, and let dry before reattaching. This maintains effectiveness and extends pad life.

