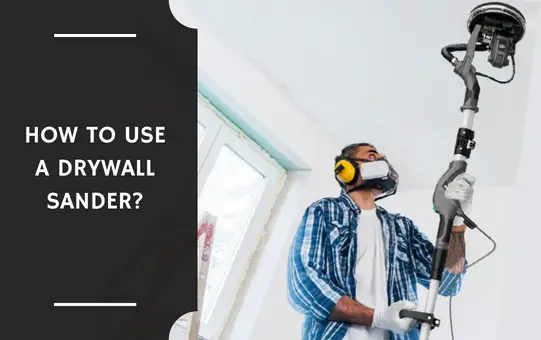
No home renovation job is complete without good sanding! Whether you’re smoothing out a patch job or giving an entire wall a new look, a drywall sander is an ideal tool for the job. But how do you use one correctly and safely?
How to Use a Drywall Sander?
To start, set the sander on a stable surface and adjust the height of the sanding pad so that the sandpaper is flat against the surface you’re working on. Next, align the edge of the sandpaper to the wall. Press firmly. Repeat for the entire length of the wall.
This blog post will tell you in detail about using a drywall sander. Read on to find out how to use drywall sander like a pro!
See Also: Can a Drywall Sander Be Used on Wood Floors?
How to Use a Drywall Sander? – Guide
Before using a drywall sander, it is important to understand that the purpose of the sander is to smooth out rough areas of the drywall that would otherwise cause problems during the application of a wall covering.
Sanding drywall requires great care, and proper technique is key to avoiding harm to the drywall and causing damage to your project.
Preparing to Use a Drywall Sander
- Inspect your drywall sander and make sure that all of the parts are in good working order. Read the manufacturer’s instructions carefully and familiarize yourself with the operation of the sander.
- Attach the sandpaper to the sander according to the manufacturer’s instructions. Be sure to use the correct type and grit of sandpaper for your particular project.
- Choose a well-ventilated work area to set up your sander. You’ll be creating a lot of dust, so it’s important to have good ventilation to avoid breathing it in.
- Cover any furniture or flooring in the area where you’ll be working with a drop cloth or other protective covering.
- Plug in your drywall sander and turn it on to the lowest setting. Hold it close to the wall and begin moving it back and forth in long, even strokes. Apply light pressure as you sand to avoid damaging the wall surface.
Attaching a Sandpaper Roll to the Drywall Sander
If you’re interested in learning how to use a drywall sander, one of the first things you’ll need to know is how to attach a sandpaper roll to the sander.
This process is actually quite simple, and it only takes a few minutes to complete. Here’s what you need to do:
- Begin by removing the backing paper from the sandpaper roll. This will expose the adhesive side of the roll.
- Next, align the sandpaper roll with the sander’s drum. Make sure that the adhesive side is facing towards the drum.
- Once the sandpaper roll is properly aligned, begin wrapping it around the drum. Continue wrapping until the entire roll is attached to the sander.
- Finally, use a piece of duct tape or another type of strong adhesive to secure the end of the sandpaper roll in place. That’s all there is to it!

Sanding Drywall with a Drywall Sander
If you’re going to be sanding drywall, you’re going to need a drywall sander. These sanders are designed specifically for the job and will make your life a lot easier. Here’s a quick guide on how to use one:
First, you’ll need to gather your materials. You’ll need the drywall sander, of course, along with some sandpaper. You’ll also need a dust mask to protect your lungs from the dust generated by the sanding process.
Once you have everything, set up your workspace. Make sure you have a good amount of light so you can see what you’re doing, and cover any surfaces that you don’t want covered in dust.
Now it’s time to start sanding. Put on your dust mask and attach the sandpaper to the sander. Start with coarse grit paper and work your way up to finer grits as needed.
When you’re finished sanding, vacuum up all the dust and dispose of it properly. Wash your hands thoroughly to remove any lingering dust particles.
Cleaning and Storing the Drywall Sander
- When you have finished using the drywall sander, it is important to clean it before storing it away.
- To clean the sander, first, remove any excess dust and debris from the sanding pad and brush attachment.
- Next, use a mild soap and water solution to clean the body of the sander. Be sure to avoid getting any water on the electrical components of the sander.
- Once the sander is cleaned, dry it completely with a soft cloth before storing it in a safe, dry location.
Tips for Using a Drywall Sander
When using a drywall sander, always start with the coarsest sandpaper grit to remove any existing paint or other finishes.
If you’re starting with a new drywall installation, sanding is still necessary to create a smooth surface for painting or wallpapering.
Use medium-grit sandpaper next to continue smoothing the surface, then finish with fine-grit sandpaper for best results. Always vacuum up any dust created while sanding before proceeding to the next step.
Conclusion
Using a drywall sander can be a great way to make your drywall project easier and faster. With the right preparation and safety precautions, you can achieve a smooth finish on your walls.
With a bit of practice, you too can become an expert in drywall sanding. So, why not give it a try and start sanding your walls today! I hope this blog post is helpful for you in understanding how to use a drywall sander.
Read Also: Difference Between Drywall Sander and Orbital Sander?