Headlights play a crucial role in ensuring a driver’s safety on the road. Over time, however, they can become dull, scratched, and hazy, reducing their effectiveness and overall appearance.
What Sandpaper to Use on Headlights?
For headlights, you should use very fine grit sandpaper, such as 2000 or 3000 grit. It is important to use very fine grit sandpaper so that you don’t leave any scratches on the headlight lens.
In this article, we will explore the various types of sandpaper available and guide you on what sandpaper to use on headlights.
See Also: What Sandpaper to Use on Wood Before Painting?
What Sandpaper to Use on Headlights? – Guide
Choosing the right sandpaper grit is crucial to achieving successful headlight restoration. Here is the detailed guide for choosing the perfect sandpaper for sanding headlights:
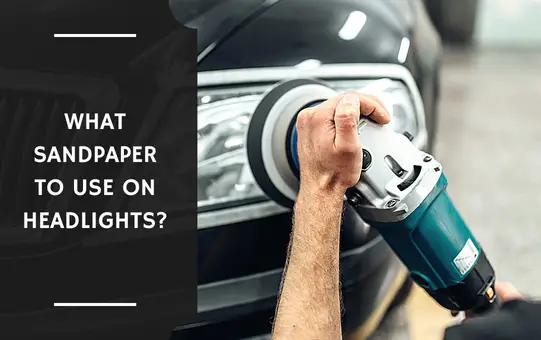
Understanding the Headlight Restoration Process
Before diving into the world of sandpaper, it’s essential to understand the headlight restoration process.
Generally, it involves several steps, including cleaning, sanding, polishing, and sealing. However, our focus here will be on the sanding phase, as it sets the foundation for achieving a smooth and clear headlight surface.
Different Grits of Sandpaper
Sandpaper comes in different grit sizes, ranging from coarse to fine. The grit refers to the number of abrasive particles per square inch on the paper.
The higher the grit number, the finer the sandpaper. For headlight restoration, it’s crucial to use a progression of sandpaper grits to gradually remove imperfections and achieve a smooth surface.
- Coarse Grit (800-1000)
Coarse grit sandpaper, such as 800 or 1000, is the first step in the sanding process. It helps remove the top layer of damaged and oxidized plastic from the headlight.
This rougher grit is effective in tackling heavy scratches, pitting, and yellowing. It’s important to note that using coarse grit alone may leave visible scratches on the surface, which is why a progression to finer grits is necessary.
- Medium Grit (1500-2000)
After the initial coarse sanding, transitioning to medium grit sandpaper is the next step.
Medium-grit sandpaper, such as 1500 or 2000, helps to further refine the surface and eliminate the scratches left by the coarse grit.
This grit is effective in smoothing out the headlight and preparing it for the final stages of restoration.
- Fine Grit (3000-5000)
To achieve a smooth and polished finish, fine-grit sandpaper is crucial. Grits ranging from 3000 to 5000 are considered fine and are ideal for the final sanding stages of headlight restoration.
This sandpaper removes any remaining imperfections, micro-scratches, and haze, leaving the surface ready for the polishing and sealing steps.
Wet vs. Dry Sanding
When using sandpaper for headlight restoration, it’s essential to consider whether to wet sand or dry sand.
Wet sanding involves using water or a lubricant to keep the surface wet while sanding, which helps to minimize heat and prevent the sandpaper from clogging.
Dry sanding, on the other hand, is done without any liquid. Both methods have their advantages, and the choice depends on personal preference and the specific sandpaper being used.
Wet sanding is generally recommended for headlight restoration as it provides better control and helps prevent overheating the plastic.
It also allows for easier cleanup and reduces the risk of creating deep scratches. However, some sandpapers are specifically designed for dry sanding, so it’s important to follow the manufacturer’s instructions.
Additional Tips for Headlight Sanding
To achieve optimal results while sanding your headlights, consider the following additional tips:
- Protect surrounding areas: Before sanding, ensure to protect the surrounding areas of the headlights, such as the car’s paint, with masking tape or plastic wrap. This precautionary step will prevent accidental damage to the car’s paint or other delicate surfaces.
- Use a sanding block: To maintain even pressure and prevent uneven sanding, it’s recommended to use a sanding block instead of sanding by hand. A sanding block provides a flat and stable surface, ensuring consistent results.
- Work in a well-ventilated area: Sanding can generate dust particles that may be harmful if inhaled. It’s important to work in a well-ventilated area or consider wearing a protective mask to avoid breathing in the dust.
- Follow the sanding pattern: When sanding, it’s best to follow a horizontal or vertical pattern rather than circular motions. This helps to maintain an even and consistent sanding process, reducing the risk of uneven surfaces or visible sanding marks.
- Take breaks and evaluate progress: Regularly pause during the sanding process to wipe away the debris and evaluate the progress. This allows you to assess the level of sanding needed and determine if any areas require further attention.
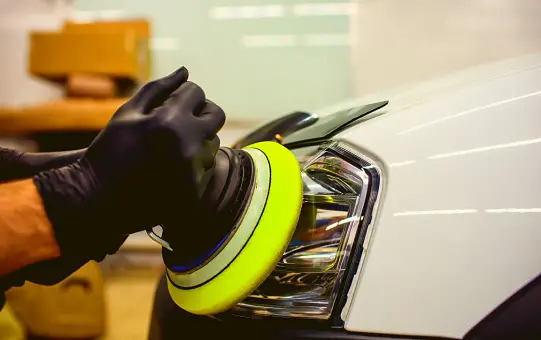
Final Steps of Headlight Restoration
After completing the sanding process, it’s important to proceed with the remaining steps of headlight restoration, which include polishing and sealing.
Polishing helps to remove any fine scratches and restore the clarity and shine of the headlights.
A quality plastic polish and a soft cloth or polishing pad can be used for this step. Finally, sealing the headlights with a UV-resistant sealant helps to protect the newly restored surface and prolong the clarity of the headlights.
Conclusion
Choosing the correct sandpaper grit is vital for effective sanding headlights restoration. Coarse grit removes imperfections, while medium and fine grits create a smooth finish.
Wet sanding is recommended for better control. Remember to protect surrounding areas, use a sanding block, work in a well-ventilated area, follow the sanding pattern, and evaluate progress.
By following these guidelines and completing the entire restoration process, you can restore clarity and ensure safer driving.
See Also: Can I Use Sandpaper on My Feet?
Are 3000 grit sandpaper for headlights effective?
3000 grit sandpaper for headlights: 3000 grit sandpaper can be effective for restoring headlights, especially when used as part of a multi-step process. It’s typically used in conjunction with progressively finer grits (e.g., starting with a lower grit like 800 or 1000 and gradually moving up to 3000) to remove oxidation, scratches, and hazing from the headlight surface.
what grit sandpaper do i use for headlight restoration?
For headlight restoration, start with a lower grit sandpaper, such as 800 or 1000, to remove heavy oxidation and scratches. Progress to finer grits like 1500, 2000, and finally 3000 to achieve a smooth finish.